Introduction
Welcome to the Catacombs Third Edition Strategy Guide. This article will provide you with detailed tactics for use within Catacombs Third Edition and the Catacombs Third Edition Cavern of Soloth expansion.
Special thanks to Christian Busch for writing the guide. Check out his BoardGameGeek profile and his Board Gaming Blog.
Catacombs Primer: Heroes
With the new Third Edition of Catacombs out, I thought I’d make a revised primer for the Heroes (new and old) for those looking for an overview or some initial concepts/strategies that are now in this new addition. I’ll work on a primer for the Catacomb Lords as well but first, the Heroes of Catacombs.
Like I did with my Monster Primer, I decided to add a “power ranking” list to help players decide at a glance which Hero to use in their game. Like I’ve used in my other rankings, I have four tiers: Top Tier, Upper Tier, Standard Tier, Lower Tier. While a tiered system obviously ranks the characters against themselves, it is not to mean that “top tier” entries are broken or “lower tier” entries are unusable, but rather, they should be used as a guide to help balance the setup of the game. Pitting similarly tiered entries against each other will lead to the most enjoyable games whereas trying the opposite will yield very lopsided results, especially if there is a skill discrepancy between the players.
To see all of my strategy articles for Catacombs 3rd edition, check out my Geeklist.
Hero Ranking
Top Tier
Larra, Huntress (R)
Maireya, Raven Empress (R)
Regulus, Vampire Noble (R)
Elani, Thief (with Promo Shadowlithe Fist) (B)
Aprill, Fire Mage (R)
Upper Tier
Zacalan, Witch Hunter (CoS)
Estie, Amazon (R)
Sequolia, Forest Sprite (R)
Varesh, Wizard (B)
Standard Tier
Elani, Thief (no promo) (B)
Oleira, Elf (B)
Xoric, Barbarian (B)
Hanev, Paladin (CoS)
Vysara, Sorceress (CoS)
Katrine, Ice Princess (CoS)
Ulselu, Centaur (CoS)
Raisthrim, Ice Mage (KB)
Lower Tier
Beeble, dwarf miner (CoS)
Roosan, Chicken (B)
Marorg, Skeleton (B)
Key
B- Base Set
CoS- Cavern of Soloth expansion
R- Resurrection Content
Hero Power Rankings are based on the survivability of the hero (health and defensive options), what abilities, spells, or items they start with, and how strong/flexible their shot sequences are.
Base/Core Heroes
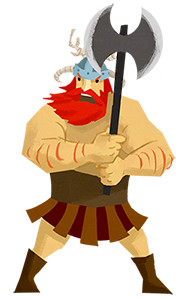
Xoric the Barbarian
Similar to the original version, Xoric the Barbarian is the beefiest of the Base set heroes. Not much has changed with him and he is still your all-around beat stick and can withstand jumping into the fray and taking a few hits. This doesn’t mean he is invincible and you can watch that health advantage deteriorate pretty fast if you leave him exposed too often.
What makes the Barbarian unique is he comes equipped with two Berserker Battle Axe items. These items are almost a one-for-one replacement of the original editions Rage ability: a 4 chained Melee shot that cannot damage the same target twice. This is a good room clearing item when faced with multiple weak enemies. You only get two Battle Axe items in a game so you have to conserve them for only the most necessary times. Of course, if the heroes are all about to lose, there is no glory for losing and having Rage actions left at the end of the game. The biggest change from the original edition is using this item no longer stuns the Barbarian. You’ll want to make this item count so try not to use it to set up shots but rather, have another hero bump you into position so that even your first melee shot is useful.

Oleira the Elf
Weighing in at a weak 8 life, Oleira the Elf is quite the opposite of the Barbarian but has a similar, straight forward approach.
Oleira gains a bit of a boost in this new edition in that she starts with the Spirit Familiar item and 2 Elven Arrow abilities. These Eleven Arrow abilities have been beefed up from the original version in they now allow you to Rush (move) and then take a shot with the arrow disc. Being able to move into a hidden position behind another hero (like Xoric) or an obstacle is key here so that you can fire your missiles while not being a target yourself. Placing a missile disc 1 inch from your character gives you a lot of freedom and can open up attack options that other characters would need an extra turn to set up for. Missiles are also handy against turtling monsters that have missile shots of their own or an alternative to melee-ing into a group of monsters to take out a key target.
The Spirit Familiar is interesting in that she can act like your shield while you hide behind and shoot arrows behind. Since the familiar is immune to missile shots, it will force enemies to close in and take her out, leaving you room to pounce with your other forces. Since she only has a Rush (move) shot, she can also be used to push your heroes into better positions to set up new shots.

Elani the Thief
Like the Barbarian, Elani the Thief changed very little from previous versions. She still sports 10 Life so will be doing her fair share of the rough and tumble. I still see her overlooked a little bit as “weak” hero but she can be critical to the team and with her Promo card (more on that below), she easily becomes the MVP of the Base set heroes.
This new edition simplifies her powers a bit by making her standard shot sequence Melee > Rush, which allows her to jump out and flee or push other characters in/out of position. This sequence maintains it’s “poor flicker” handicap as its a chance to flee back to safety after a poor shot. The cunning player will see it differently however. She is the ultimate positional piece: Since so much can rely on lining up good shots and working as a team, she can use two shots to get her allies into prime position at the beginning of a Hero turn.
Her native power can get obscene if the hero team is paying attention and engineers it well: Elani gets a bonus 1 Gold for every monster she personally kills. Gold is a premium in this game and some rooms can double their gold haul if you let the Thief do all the hard lifting. That extra gold needs to happen in the first two rooms where gold availability is low due to weaker monsters and they are immediately before the Merchant room where you can upgrade your heroes with better items. Her role shifts later when she pulls back on the the offense and lets the rest of the heroes soften up the 2 Life monsters and she swings in taking the kills. That extra gold will equate to healing after the 4th room and since this is a game of attrition, any extra healing will go a long way to winning against the Catacomb Lord.
Recently, a new Promo card was released at Gen Con 2015. The publisher has stated that the promo should go up on the BGG store sometime soon and will later be added to a future release so don’t worry if you weren’t able to snag one at a convention. This new ability, the Shadowlithe Fist, is pretty amazing and instantly makes the Thief the strongest hero in the Base set. It is a “once per room” ability that allows the Thief to Rush > Critical Melee > Rush. This power lets Elani run into the fray, assassinate any monster with the critical shot and duck back out to safety. No room is safe and it makes her the priority target for the Overseer player. Couple it with the fact that her monster kills generate extra gold and she becomes a force to reckon with.
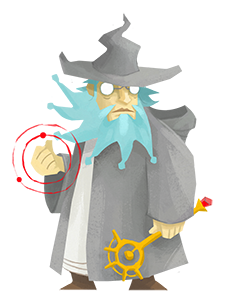
Varesh the Wizard
Varesh the Wizard probably underwent the most radical change from the previous editions and is the only Character to go down in power. I think this works better as it makes all the Heroes are now valid choices. Varesh does gain an ability to throw a Fireball once per room (that doesn’t eat up a spell card) but loses some spells and sees some old spells weaken in effect. It’s not all bad as he gains some other spells but overall, the changes make him less able to deal in raw power. The key to playing Varesh is much like the previous edition: do not hold onto your spells but use them to mitigate damage to your allies. If that fireball can take out an enemy or two in an early room, go for it. That is an enemy not dealing you damage later and there is no prize for winning and having a hand full of spells left over.
To briefly touch on a few spells, let’s look at the offensive ones first. Drain Life, Fireball, and Magic Missile are all offensive. Fireball is a bigger disc so it’s easier to hit monsters with and has some weight behind it so it can be used to offensively push monsters around. The Wizard gets a nice little ranged Drain Life shot which can heal him when it deals damage. Magic Missile is the crowning jewel in this set as it is one of the few times in a game where you can hit multiple times without any negative drawback.
Defensive spells are comprised of Shield, Heal, Cure Poison, Ice Blast, and Teleport. Shield is a great positional disruptor, especially with the change that allows you to flick close monsters away, as it can protect a hero from a bad set up or bad flick. Heal is an interesting choice as it went up in power (heals 4 life now) but limited in use (only heals Varesh). When putting Drain Life and Heal together, his total life ends with a whopping 14, outclassing even Xoric the Barbarian. This is important to remember. Since this is a game of attrition, spreading damage around your party is important and so don’t let the normal fantasy norms fool you. Get this Wizard into the fray and get him there often. Spend those spells and make the Catacomb Lord take note of you and hit you often. Hits against you can be healed up later or saves your arguably squishier allies from harm. If you need to take a breather, you still have all those nice ranged spells in your back pocket but the Thief and Barbarian get no breaks. When they are in the thick of it, they are in it for the long haul. Cure Poison is new but with the addition of poison monsters in the base set, it was kind of needed. Ice Blast can be used offensively to freeze a tricky monster or kill a tough one that is the last monster in the room. Teleport received a few rules changes but even after the nerf, it still is a great spell to have on hand. It can still save a foolish ally that overextended themselves but loses the arguably broken first strike assassination strategy since the target is out for a round and then comes back in with only a melee shot.
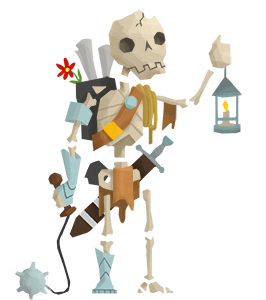
Marorg the Skeleton
The new edition introduces two new Base set heroes. The first is a promotion of the old skeleton ally of the Wizard to a full blown hero (likely why you can’t just summon him at will anymore). He comes in at 10 life, making him a decent front-line hero and has an interesting ability in that he is immune to poison modifiers and the attacks that they modify. An interesting power but only really useful if you see a lot of poison monsters or are facing Shargila the Gorgon.
With his power, Marorg works well as an intro character for new players as there isn’t much to remember and they can just play him easily. It is kind of funny to see a room like Sepulcher of the Sisters show up with him. That room is a level 2 room (usually a scary undertaking) but since everything in the room except two blood skulls has poison shots, Marorg can basically solo the room and not worry about taking much damage.
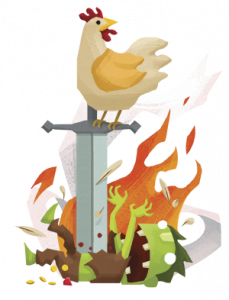
Roosan the Chicken Champion
The last hero in the Base set is the wacky Roosan the Chicken Champion. Seemingly included as a joke, Roosan actually has some fun and thematic characteristics that can make him a worthwhile addition to your hero roster. He comes in on the weaker side at 8 life but has a pretty interesting ability: Feathers of Fury.
Feathers of Fury is a quirky power that, once per room, lets you use 4 Rush shots. Rush shots do no damage so some might dismiss this as weak but this game is about positioning in a lot of situations and 4 rush shots can usually get a couple of heroes into good position or knock some monsters out of the way. Another use is against shadow monsters that need to be knocked off the board. I find great amusement that Roosan can go into “beast mode” and solo almost every shadow monster off the board in one turn. Another use of the Feathers of Fury is in the Catacomb Lord room. Roosan can shoot into the backfield and try to knock the Catacomb Lord over to the Hero side of the board where he will be away from his minions and in line of the rest of the Heroes. All pretty cool for a chicken (Champion or otherwise).
Cavern of Soloth Heroes
The first expansion for the new 3rd edition features 6 more heroes.

Katrine the Ice Princess:
Mimicking the Elf, the Ice Princess is a feather weight, 8 Life hero with some ranged attack. She is more powerful than she seems as her Ice Blast special abilities have more benefits than are immediately apparent.
Her special ability is now twice per room so you’ll want to make sure you’re using it often to make the most it. It is a melee shot followed by an Ice Shot which will freeze an enemy by placing the Ice disc on top of the monster that is hit. Until that disc is knocked off, the monster below it can take no actions. The way to really manipulate the ability is using it on a tough monster at the end of the room. If that monster is the last monster, it ends the room by auto-killing it. Otherwise, it’s a delaying tactic as it forces the Catacomb Lord to burn a monster’s action by hitting his own frozen monster to free up the (likely) better monster below it. It’s not foolproof as a savvy Catacomb Lord might be able to ricochet a monster into hitting both the frozen one and a hero, freeing the monster and damaging a hero in the process.
Lastly, Katrine nullifies Fireball shots which, depending on the Catacomb Lord, can be a huge benefit. Even if not facing certain Catacomb Lords, her nullify power can be a deterrent against using monsters that throw fireball shots as Katrine’s immunity means that she can wade in fearlessly and take those monsters out.
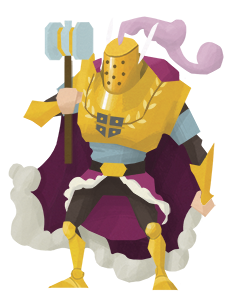
Hanev the Paladin:
Another beefcake with his 11 Life, he is the ultimate tank. Where the Barbarian can hold his own in a fight, eventually he’ll come crying home if he’s in the fire too long. The Paladin thrives in the fray and is where you want him almost every room. That doesn’t mean you can leave him unsupported but you want to make sure the Catacomb Lord is forced to make easy shots against him vs hard shots against your allies so that his ability can get the maximum mileage.
Hanev’s Imperial Armour abilities mean that you can choose to activate the ability after a hit to nullify the damage and effects of almost any shot. Every shot you absorb is 3gold your party doesn’t need to spend healing your broken body. Played well, that can be 30gold not needed in healing over the course of the game.
Vysara the Sorceress:
The Sorceress gets an interesting upgrade to her previous edition. Instead of limiting her powers to a fixed amount at the beginning of the game, Vysara gains two ability cards to use in each room.
The ability cards simplify her options but makes her more balanced over the course of the game. The Sorceress gains a new Mystic Flare option and the familiar Open Portal but loses the often never used Alternate Form power.
Mystic Flare gets a boost as it is a critical Missile shot followed by an escaping Rush shot. This critical Missile shot available from round one and repeatable in every room is a considerable offensive boost for the Sorceress and her Open Portal ability can help with some very timely maneuvering. This can be particularly effective if Vysara has moved into a central location to use her Mystic Flare and later swaps places with a good melee hero like Xoric or Elani.
Vysara has one last trick where she also starts with 2 powerful spell cards: the Giant Fireball and Heal All spells. Heal All is a great spell that when used late game, can save you 12 gold in one turn. The Giant Fireball is another alpha strike weapon that can be great for clearing out clusters of 2 life monsters.
Zacalan the Witch Hunter:
This guy again breaks the mold and is usually the most sought after hero in my play circle. He is the only hero in the game that gets more powerful by himself as the game progresses. One can argue that all the heroes have the option to gain a bit more power after the Merchant room but the Witch Hunter takes that idea and uses it at the end of every room. Unfortunately, it’s a pretty selfish character so having the right player dynamic is key.
The Witch Hunter’s ability is to create personal items for himself by discarding killed monsters that are on his playmat. This means the Witch Hunter wants to get the kills much in the same way as the Thief but instead of getting gold (which can benefit everyone) he gets personal items that make him better. On the plus side, he also is less likely to need or want Merchant Items so the gold haul is only split amongst the 3 other heroes.
To craft items, the Witch Hunter has to spend a number of monster discs to pay for specific items. This gets rid of the previous system where the Witch Hunter had to collect specific monster family discs and if they didn’t show up then he couldn’t get a particular item.
These items are fantastic and range from a Flame Sword that can (once per room) launch 2 fireball shots or the ultimate Bone Dagger that grants a Melee and Critical Melee sequence. If the hero party supports him, the Witch Hunter can become nigh unstoppable with a bunch of items.
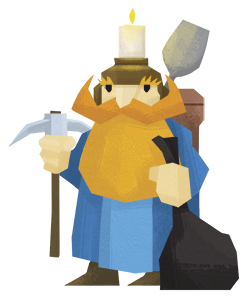
Beeble the Dwarf Miner
The new addition to the Cavern of Soloth heroes is Beeble the Dwarven Miner. Originally an ally character in the previous version, Beeble now is a full-fledged hero. He has an odd 9 health and is pretty simple as heroes go.
He is the only Hero to have a combo item: the Throwing Axe. This axe is one of the best combo items as it give Beeble the chance to finish off a turn with a Missile shot. In general, he is not as handy as the Elf as she gets 2 missile shots per room and a nice Spirit Familiar for support.

Ulselu the Centaur Warrior
Also a new addition to the Cavern group, Ulselu was a summoned ally of the Witch Hunter in the previous edition but now gains honorary hero status as well. Also falling on the more simple side of the game, Ulselu’s power is really in his optional attack sequences (the first hero to have this in their main attack sequence).
The options aren’t that exciting, standard Melee shot or standard Missile shot but that Missile shot as a standard action each round gives the hero the first opportunity to camp behind a pillar and reverse the role the Overseer sometimes plays. You should use that technique early and use it often as his 8 life won’t go very far if you expose him.
Resurrection Heroes
These Heroes appeared as bonus material for the initial 3rd edition Kickstarter.
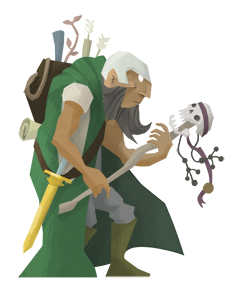
Raisthrim the Ice Mage
Raisthrim the Ice Mage was an bonus hero that came with the 3rd edition kickstarter in 2015. Like the Ice Princess, he likes to nullify Fireball shots. Being a mage, he comes with a handful of spells that include a couple of Cure Poison, two Drain Energy, and the always useful Heal All.
Like we saw with Beeble, Raisthrim gets two options for his shot sequence: Melee shot and Ice shot. Granting him continuous Ice shots is an interesting twist as he doesn’t have to worry about wasting an ability on a risky shot. While continuously freezing monsters won’t kill them, the disruption it can cause as the Overseer must fight to keep un-freezing his minions can work well in a defensive set up.
While Raisthrim has the lower-life total typical of most magic users in the game, his Heal All and double Drain Energy spells actually give him a bit more staying power. Combined with the defensive strategy of freezing the big threats, Raisthrim can make for a strong defensive addition to a party.
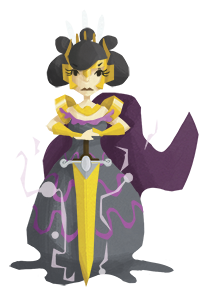
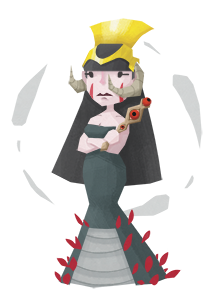
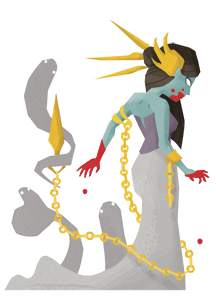
Maireya the Raven Empress
Another bonus from the Kickstarter campaign, the Raven Empress is one of the strongest heroes in the game. Everything about her is larger than life. She comes in with a beastly 12 life, she can use any item in the game, she has a double Chain melee shot sequence as her standard shot sequence, and, when things get really bad, she can someone a powerful Stone Antient to help tip the tide.
Having a double chain melee shot sequence standard opens up a lot of attack options with Maireya. While there are other heroes that can hit for more damage in a single turn, the Raven Empress excels at manuevering and clearing out large groups of weaker monsters.
The natural use of a Stone Antient is an interesting option as well. Antients are loyal to know one but if a hero has the option to summon one, it puts the first strike power in their hands. A savvy will wait until they have the advantage before summoning an Antient so that they can wreak the most havoc while taking the least amount of damage when the Antient eventually flips sides.
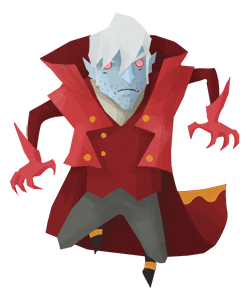
Regulus the Vampire Noble
Regulus the Vampire Noble was a bonus in that initial 3rd edition Kickstarter but tied to the Caverns of Soloth expansion. He is a powerful fast striker with 10 life and a Rush shot followed by Melee shot for his standard sequence. While he can’t clear a room like the Raven Empress can, you’ll find that his Rush first shot works much like the Raven Empress since a lot of Maireya’s initial shots will burn that first Chain Melee as a positional move option.
Regulus has another trick up his sleeve in that he comes with the powerful Vampire Sword item. This item grants Regulus a Melee shot followed by Regeneration Melee shot once per room. Over the course of the game, this can heal Regulus 5-6 times depending on your game layout and can save the party 15 to 18 gold. Not only that, it gives Regulus some staying power while making for a very nice offensive attack.
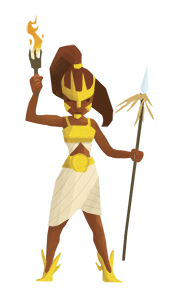
Estie the Amazon
Estie the Amazon is our first “Chicks” hero and she is another big melee fighter. She is a very simple character but don’t let that fool you. Her 11 life makes her useful in almost any fight but it is her natural River Torrent ability that makes her really shine.
Estie’s River Torrent ability is a once-per-room Rush shot, Rush shot, Critical Melee shot. This triple sequence attack has a lot of similarity with Elani’s Shadowlithe Fist power but the critical difference is it starts with 2 Rush shots and ends with the Critical. This effectively makes the Amazon the most deadly assassin in the game. There is no where a monster can hide from 2 rush shots and the Crititcal shot follow up will remove all but the strongest monster.
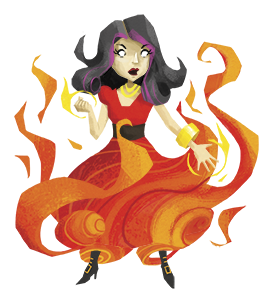
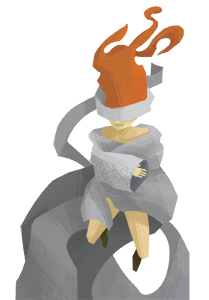
Aprill the Fire Mage
Aprill the Fire Mage is one of the strongest magic-centric characters. She starts with an impressive 10 life (unheard of for a magic-focused character) and has a battery of high-end abilities and spells. To finish everything off, she also nullifies Fireball and Firewall damage.
Aprill’s abilities and spells are what drive her performance in the group. She starts off with 3 new Fire Blast abilities that ramp up the power of the Wizard’s Fire attack by adding a positioning Rush shot before the Fireball attack. She comes with a Giant Fireball spell for brutal room clearing and damage dealing power and, like the Raven Empress, comes with a pet Antient of her own (which is arguably better).
Her nullifying powers are even worse for the Overseer as it can almost completely shut down the main attack strategies of Phoshar the Dragon.
Sequolia the Forest Sprite
Sequolia the Forest Sprite is a unique character among the heroes. She is the first actual “healer” in the game and this alone should make you take note of her. She is also the most fragile with 7 life but more than makes up for it with her healing abilities and shot sequence.
Sequolia has only one ability but since it is Heal All, it is quite great at managing the health of your group of heroes. Even if it only benefits one character per room, it will save you 15-18 gold over the life of the adventure. Unlike the savings gained by Regulus or Hanev, this saving is directly towards the most needed hero. With Regulus and Hanev, an Overseer can ignore them and try to pick on the weaker heroes, making it so their healing or defensive abilities aren’t needed. Since Heal All hits everyone, if the Overseer was picking on one or two weaker heroes, this ability will give them a boost. I would make sure that you use it in every room and that might mean that you wait to kill the last monster in the room for you to trip the ability before you leave.
Sequolia also has 2 Heal spells. Unfortunately they only target her so they aren’t as great at mitigating the damage around the group but it does mean that she isn’t as fragile as that 7 life suggests. Rounding out her healing capacity is a couple of Cure Poison spells in case that starts to be a problem as well.
The Forest Sprite is not just a back-of-the-field damage mitigator though, she also has a pretty great standard shot sequence that duplicates Oliera’s Elven Arrow ability (Rush shot followed by Missile shot) but since it is a standard sequence, she can use it every turn. Unless you run into a monster that nullifies Missile shots, Sequolia will be able to “run and gun” better than any other character, helping keep that low starting life value at maximum.

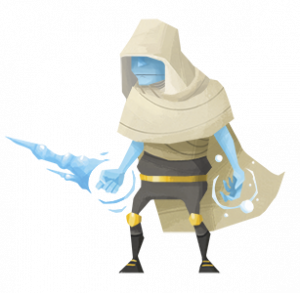
Larra the Huntress
Ah Larra… she and her trusty wolf are the best hero duo in the game. You don’t even need to read anymore and just trust me that we’ve seen a lot of powerful heroes but Larra the Huntress resets the entire power curve.
Larra looks simple enough. Just one complex shot sequence and some additional rules on her card but she doesn’t have a stack of spell cards or abilities to really make her shine. And she doesn’t need to. Everything you need is in that shot sequence.
Not going to lie, that sequence is complicated but once you figure it out, you’ll be ruining your Overseer’s day in no time. To start off, Larra has her wolf companion disc which is like a familiar on steroids. It works like a shield shot so before Larra does anything, you place the wolf companion within an inch of Larra and shoot him like a ranged shot that deals no damage. Next Larra uses a Rush shot to move into a position where she can deal the most damage, hopefully near her wolf companion but it depends on the situation. Finally, the Huntress executes a standard Melee shot. Pretty simple but that isn’t where it ends. The special rules governing her wolf companion trigger if her melee shot dealt damage and now the wolf can follow up with a Melee shot of his own. Finally, at the end of it all, the wolf disc moves back to within an inch of Larra to guard her for the rest of the turn. After the monsters go Larra gets to do it all over again.
So now you’ve seen what Larra can do, why do I think she is the most powerful? It lies in the standard damage output and flexibility this fun sequence can achieve. No other hero can consistently produce 2 damage against the same target. Some might be able to do it once a room or even produce more briefly but it is Larra’s turn after turn of 2 damage punishment that pushes her over the top. This damage is flexible too since it is no one critical shot but two separate Melee shots. Nothing in the game nullifies it and it is highly positional so monsters can’t really hide from it.
After all the damage is dealt you also have a lot of defensive options since the wolf initially acts as a Shield shot- pushing monster or heroes into the best positions for the team, then resetting into a guard position in front of any nasty monsters that are left on the board.
With 10 life, she is more than capable of mixing it up in the middle of battle and with her wolf “shield” she’ll likely mitigate damage more than most other heroes. She is an odd hero in that she actually gets worse with weapon items since her standard sequence is so strong, though combo items just make things obscene.
Catacombs Primer: Catacomb Lords
This primer will focus on the Catacomb Lords themselves. Like the heroes’ primer, I’ll start with the base game and then tackle the additional expansion/bonus Catacomb Lords.
A Catacomb Lord is made up of a few more elements than the heroes so I’ll try to bring some order to their discussion. First is the Mercenary Monster the Catacomb Lord brings to the specific game, next the minion monsters that will accompany the Catacomb Lord in the final battle, and finally the Life total and Shot Sequences.
Mercenary Monsters are the (?) circles that appear on some of the room cards. It’s a nice subtle way to have the Catacomb Lord influence the entire run of the campaign depending on what Mercenary Monster continuously shows up.
Base Set
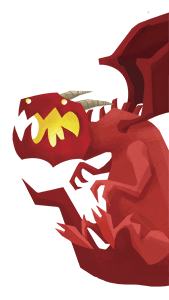
Phoshar the Dragon
Phoshar is interesting. He starts with all the Fire Spirits on the board but if you place them all, he won’t be able to summon them and that 4th shot sequence is useless. It may be better to hold a few back off the board so you can choose how and when they come into the board. You’re going to want to maximize these Fire Spirit fire walls and that means keeping them alive to attack. Leaving them on the board invites the heroes to just kill them and clear them off the board. Since Phoshar has 10 life, this will be a long fight and those walls can really ruin the heroes’ day.
After the Fire Spirits turn into walls, it’s up to the Big Bad to do his business which likely means constantly chain-shotting the heroes until they die. Success will depend on how wounded the heroes are before they get to the Catacomb Lord room and how well Phoshar can use those Fire Walls to inflict more damage as he Chain shots heroes around. The best case scenario is Phoshar doing about 4 damage to one hero and 2 damage to another. You might be able to eek out more damage if you can get a hero to hit multiple walls in a turn but the more you hit those walls, the more they collect on the edge of the board and out of alignment. With 10 life, it is a long road to hoe for the heroes and as their numbers dwindle, you will find that you will either want to find a place to hide and rain chain fireballs down on them or, if there is only one or two heroes left, you can “run and gun” where you use his first shot sequence to Melee (hitting or getting into position), hitting a hero with a fireball, then rushing away. If the heroes don’t have a way to reposition before they Melee, then you will likely win the day as you whittle them down and they can’t get into position to hit you back. Phoshar is definitely the strongest of the Catacomb Lords in the Base set.
Summary
Mercenary Monster: Fire Spirit
Joining Phoshar are four Fire Spirits, two Flame Wraiths, and two Giant Scorpions
Life: 10
Phoshar has four shot sequences:
Melee > Fireball > Rush
4 Chain Firebal
4 Chain Melee
Melee > summon Fire Spirit
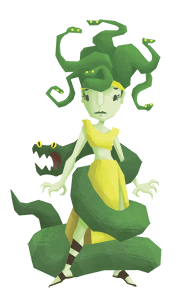
Shargila the Gorgon
Shargila has easily the nastiest melee attack in the game with that Petrify modifier but she’s actually one of the weakest Catacomb Lords to take on due to her fragile 6 life. What keeps that Petrify shot in check is that it’s the only shot she can do if she chooses it and it can leave her quite vulnerable since it is a melee shot.
Overseers that hope to see out the day with Shargila will actually need to lean heavily on her minions as both the main source of damage but also to help Shargila get in or out of danger quickly. Just to illustrate how dangerous it is for Shargila to try to petrify, if she starts the first round undamaged and petrifies a hero, she will likely take 3 damage back from the remaining heroes, petrify another hero, 2 damage back, petrify one of the remaining heroes then die from the final hero’s last strike. This assumes none of the heroes picked up any nice weapon items or don’t have dangerous, multi-damage spells at their disposal. Basically, if Shargila is caught out in the open, she can be killed in only a couple of rounds. Luckily she has Cerebus and her Minotaurs to help out as they can help line her up for good shots or push her around to safety. Unfortunately, the heroes will likely see them as the worst threat and will work hard to take them out. If you can either keep the heroes busy with snipe attacks from the Centaurs, you should have a shot at finishing them off by stunning or a late game petrify.
Summary
Mercenary Monster: Centaur
Joining Shargila are four Centaurs, two Minotaurs, and two Cerebus. Cerebi. Cerebuses. whatever.
Life: 6
Shargila has three shot sequences:
Melee > Stun Missile
Poison Melee > Poison Melee
Petrify Melee
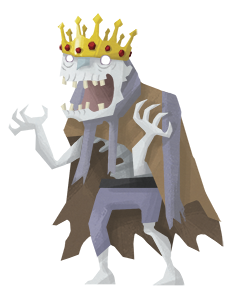
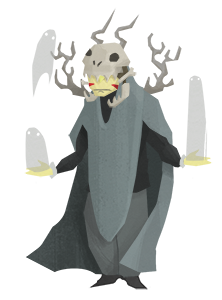
Hmotha the Lich Lord
Hmotha is another summoning Catacomb Lord and since some of his summons include his minions, you’ll have to decide whether to hold any of your Ghouls or Skeleton Warriors back. The Ghouls are an obvious choice as they will be prime targets for the heroes in the beginning while the Skeleton Warriors might be needed to help protect while you move about the battlefield trying to tie it up with newly summoned undead.
A lot of Catacomb Lord final battles are about attrition but a battle with Hmotha really emphasizes this aspect. The heroes are almost forced to continually try to manage the ever increasing horde of undead that Hmotha brings to the board. If you can keep them occupied long enough with your minions, the heroes should be distracted enough to use their more potent attacks cleaning up and your 8 life and “run and gun” sequences will allow you to prevail. Depending on how well the heroes manage the constant summonings, this battle can be just as tough as one with Phoshar the Dragon.
Summary
Mercenary Monster: Zombie
Joining Hmotha are four Skeleton Warriors, two Skeleton Archers, and two Ghouls.
Life: 8
Hmotha has four shot sequences:
Rush > Summon Skeleton Warrior > Melee
Rush > Summon Zombie > Melee
Rush > Summon Ghoul
Melee > Missile shot
Vasesak the Sorcerer
Vasesak is recommended to be the first Catacomb Lord for your first game because he is relatively easy to play, has a low health value, and only has one shot sequence learn/remember. While he can’t hold his own against experienced players or some of the upper tier heroes, Vasesak is surprisingly deadly with his minions and stun options. If you can keep some of your Zombies alive, the key for Vasesak is to use the stun options from his own shot sequence and his Zombie minions to isolate the biggest threats and pick off the weaker heroes with your Fire Demon’s chain Fireball attacks. The Trolls are basically fodder so use them as blockers to keep Vasesak and his Fire Demons alive. I’ve found that the shield shot for the Overseer is not quite as strong as it is for the heroes. This is mainly due to the shield being useful to clear enemies away and you typically won’t find yourself surrounded by enemies as the Overseer. It’s not to say that that initial shot isn’t useful, just not as much so as the heroes. The placement of the shield disc at the end of the turn, however, should not be discounted as it is the best way to keep Vasesak alive long enough to destroy the heroes.
Summary
Mercenary Monster: Skeleton Warrior
Joining Vasesak are four Zombies, two Trolls, and two Fire Demons.
Life: 6
Vasesak has one shot sequence:
Shield shot > Stun Melee > Melee
Cavern of Soloth
Cavern of Soloth introduces four new Catacomb Lords and they all ramp up the difficulty a bit more.
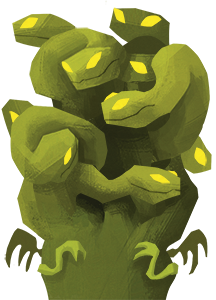
Kaulaurn the Hydra
Kaulaurn is an interesting Catacomb Lord in that he only has one shot sequence available at a time but it gets better as he loses life. Ideally, Kaulaurn wants to be in the middle sequence as long as possible as it gives him the flexibility to run and gun and concentrate damage on single targets. Not counting Catacomb Lords with Petrify or Devour in their sequence, Kaulaurn can deal more damage to any single target than any other in the game so far (including the bonus Catacomb Lords). Dealing damage like this isn’t all that great as it mirrors Shargila from the base set. While 5 damage from one source is a brutal amount of firepower, it leaves Kaulaurn vulnerable to the follow up attacks. He’s no slouch at 8 life but with an expansion, the heroes are getting a lot of new toys and abilities so 7 or 8 life is similar to the weaker Catacomb Lords in the base set.
Heroes will almost benefit better against this Lord by clearing out the minions first and leaving Kaulaurn at a manageable 7 life. Kaulaurn wants to get the heroes to push it a little farther and get into that middle sequence and hopefully have enough minions left to defeat the heroes.
Regarding the minions, they are pretty formidable. First off, all of them are 2 life monsters which makes clearing them all out a hassle. Next, there is quite a bit of poison available. If you are running Kaulaurn, you may consider trying to pick more poison monsters up during the game so that the heroes start with a few cards and are easier to pick off. The real threat in this room, however, are the Acolytes. These guys should be slinging Fire Spirits out every round to get Fire Walls choking up the field and making it harder to get at Kaulaurn himself. With enough Fire Walls in play, even the puny shield shot can push the walls around a little and deal damage. They will be the priority target for the heroes so protect them if you can.
Summary
Mercenary Monster: Armoured Beetle
Joining Kaulaurn are five Armoured Beetles, two Gargoyles, and two Infernal Acolytes.
Life: 8
Kaulaurn has three shot sequences but only one sequence is available at a time depending on his current life:
(Life 7-8): Melee > Critical Melee
(Life 4-6): Melee > Fireball > Melee > Fireball
(Life 1-3): Melee > Critical Melee > Critical Melee
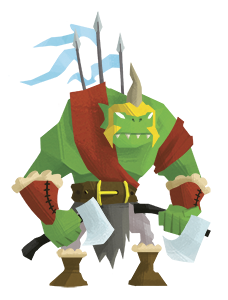
Thaggu the Orc Warchief
Thaggu is the weakest of the Cavern of Soloth Catacomb Lords at 7 life but has the most minions, including the Rust Monster. In the earlier rooms, the Rust Monster is much more dangerous but since Thaggu’s starting life is on the low side, most heroes will try to burn through their items during the first turn to deal maximum damage and not worry about the Rust shot when it comes around later. Luckily, the Rust Monster is still a brutish beat stick so he remains a credible threat.
While a lot of the Catacomb Lords (particularly the weaker ones) rely on their minions to do the heavy lifting, Thaggu takes it one step further and adds a Repeat shot to his sequence to push his minions to go further. It may take some practice but you’ll want to keep some minions nearby so that Thaggu can grant them an extra turn. Order is important to make sure you have the monster go before Thaggu so that he can get them to go again. Good candidates are any ranged shot monster (which is most of his minions) as they can stay in place and plink at the heroes and Thaggu doesn’t have to move very far to let them go again. If you’re Repeat shotting a Pit Viper or Wolf Rider, there can be a fair amount of poison flying around the room and since it is mostly with the missile shot, you can hole up defensively quite well and wreck the heroes with poison from afar. Unfortunately, any decent hero group with some nice items are likely just going to rush you and try to take you out as quickly as possible. The Wolf Riders might need to be shields for you to last long enough to turn the tide.
Summary
Mercenary Monster: Orc (as if there would be a more thematic option)
Joining the Warchief are four Orcs, two Wolf Riders, two Pit Vipers and a Rust Monster.
Life: 7
Thaggu has two shot sequences:
Melee > Critical Melee > Repeat shot
Critical Melee > Melee > Repeat shot
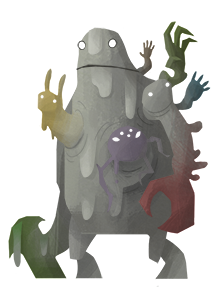
P’holith the Shapeshifer
While P’holith doesn’t have the most life of a Catacomb Lord, he is easily one of the hardest. He has a Fire Salamander Mercenary which can make even getting to him tough with the Fire Salamander having more in common with level 2 monsters than the level 1s. His room starts with four of these vile creatures and you may very well start with all of them on the board even though it weakens your shot sequence selection. It shouldn’t be too worrisome though since you have three other monster groups to choose from and you likely won’t get through them all.
A running theme with the Cavern of Soloth Catacomb Lords is the judicious use of poison in the final rooms. Starting with a pair of Vampire Bats and the ability to summon Pit Vipers and Gargoyles can make this a nasty poison apocalypse. Luckily for the heroes, P’holith can only bring out a new poison monster each turn and where poison excels is when it can overwhelm you quickly all in one round.
With the constant summoning, the minions on this board can get out of control quickly and that is why P’holith’s lower life still makes him formidable as the heroes have to waste rounds keeping the other monsters in check. P’holith’s portal ability also keeps him pretty defensive as he can jump to almost anywhere on the board, especially if you keep your monsters spread out.
Summary:
Mercenary Monster: Fire Salamander
Joining P’holith are four Fire Salamanders, two Wights, and two Vampire Bats
Life: 8
P’holith has five shot sequences:
Summon Orc > Portal > Fear Melee
Summon Gargoyle > Portal > Fear Melee
Summon Pit Viper > Portal > Fear Melee
Summon Fire Salamander > Portal > Fear Melee
Rush > Critical Melee
Surlafeure the Queen of the Underworld
The last Cavern of Soloth Catacomb Lord has one of the most interesting sequence concepts in that the majority of her sequences end with her teleporting off the map. This can be very frustrating to the heroes as she whittles them down slowly. Great care must be taken on your return because you will have only a single melee shot that next round and can wind up in a very vulnerable position if you aren’t careful. Eventually this game of hide and seek will end with most or all of your minions gone and hopefully you’ve dealt enough damage to the heroes that they can’t spread out and pummel you on your return turns.
Surlafeure has a robust 10 life so she can use some of the early rounds to really hammer on the heroes, singling out the biggest threats and taking them down or spreading out the damage so eventually none of the heroes can hide. If it gets down to one or two heroes and they can’t position well each round, you’ve basically won as you can regenerate and teleport out each turn and unless they can keep up 2 damage to your 1 regen, they’ll eventually go down due to attrition.
Surlafeure’s minions might normally be worrisome but when you aren’t around every turn, they quickly get removed by bored heroes looking for something to smash. The Manticores with their 2 life and large discs might be best used to block shot lines to Surlafeure so that she can’t be too weakened early on by a bunch of heroes aggressively using all their best items and spells.
Summary
Mercenary Monster: Sewer Rat
Joining Surlafeure are five Sewer Rats, two Flame Wraiths, and two Cerebus.
Life: 10
Surlafeure has four shot sequences:
Regeneration Melee > Melee > Teleport
Melee > Chain Missile > Chain Missile > Chain Missile > Teleport
Summon Wight > Melee > Teleport
Rush > Stun Melee
Resurrection Catacomb Lords
These bonus Catacomb Lords were part of the initial 3rd edition Kickstarter campaign.
Vaiel the Enchantress
Vaiel is the first of the bonus Catacomb Lords and has the lowest life at 6. Normally, this means an easier than normal fight for the heroes since there are a lot of ways to quickly assassinate a Catacomb Lord with less than 8 life but this is not really the case here. It can still be done depending on the heroes and item load out but Vaiel is the hardest sub-8 life Catacomb Lord out there.
A couple of things make her more of a challenge and it centers around the open ended Summon Monster (Blue “mythological” monsters, level 3 or less) and Open Portal options in her shot sequences. Similar to how P’holith is harder than your average 8 life Catacomb Lord, Vaiel’s constant summoning and portal movements can cause big issues for the heroes. If you look at her summon options, the choices are pretty clear: Centaur, Minotaur, Gargoyle, Cerebus, Manticore. In most cases, your first two summons will be the Manticores. You can deal out some serious damage throwing one of those around in the middle of a party. If you need some quick poison, a Gargoyle can help bring that in while the Cerebus is more of a ranged/defensive option. The Minotaur might be nice if you see a lot of heroes with missile attacks as they can form an effective shield against getting sniped.
If you can defend against the initial hero alpha strike or if the heroes slow-play it, you can build up a moment that will make it very hard to take Vaiel down and things can get out of control pretty quickly. To help defend against an aggressive hero team, use your Flame Wraiths and Rakshasa as a barrier to help stop the initial incoming attacks.
Summary:
Mercenary Monster: Centaur
Joining Vaiel are four Skeleton Warriors, two Flame Wraiths, and the Rakshasa
Life: 6
Vaiel has three shot sequences:
Open Portal > Poison Melee > Melee
Open Portal > Summon Blue Monster > Rush
Critical Melee

Ithair the ice Dragon
Even though Ithair is in that middle weight 8 life group of Catacomb Lords, he is probably the weakest. His shot sequences are ok and can be strong but his minions are all melee based and there isn’t a lot of synergy. Ithair can still dish out some pain but it will take some mitigation from Fenris’ Bite Shot and Ithair’s stun sequence to slow down an aggressive hero party. The Minotaurs are best used as defensive meat shields and the rats will be most effective by keeping them as spread out as possible. This will keep Ithair relatively safe from aggressive openings by the heroes and the rats can help snipe those heroes that get in too close.
Being the only ranged option on the board hurts but luckily Ithair has a hefty 4 chain missile attacks. This harkens back to Phoshar’s 4 chain fireball sequence but obviously weaker. The trap here is it keeps you in one spot. This might be fine if you are already behind good cover but can be deadly if you are out in the open and don’t finish off some heroes with it. Missile discs being harder to shoot than the larger Fireball discs means that you should make sure you are confident in your shooting skills before using this sequence or be in a position with little risk of retaliation.
Summary
Mercenary Monster: Armoured Beetle
Joining Ithair are five Sewer Rats, two Minotaur, and Fenris
Life: 8
Ithair has three shot sequences:
Fear Melee > Fear Melee > Fear Melee
Melee > Stun Melee > Rush
Chain Missile > Chain Missile > Chain Missile > Chain Missile
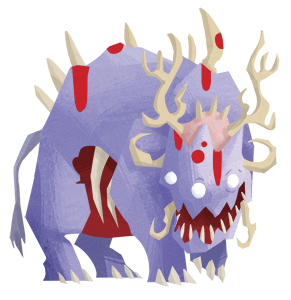
Ughurth the Behemoth
This bonus Catacomb Lord has a couple of interesting and unique features. First, he uses the largest disc for any monster (the same size as the room obstacles) and second, he makes heavy use of the Devour shot. Normally, the Devour shot is nasty but once you kill the monster, the eaten heroes pop back out and rejoin the fight. Since the Devouring monster is a Catacomb Lord, it becomes far worse as defeating the Catacomb Lord ends the game. Essentially, the Devour shot works the same as Shargila’s Petrify shot in that it completely removes a hero from the game, regardless of their current life value.
A lot of the same tactics that work for Shargila will work for Ughurth. Unfortunately, Ughurth has one of the weakest minion sets. Couple this with the fact that Ughurth is on a huge disc means you likely aren’t pushing him around much to help him line up his Devour shot. The MVP for your minions actually becomes the tiny Blood Skulls. With their Fear shot, you can send the frightened hero right at Ughurth and into his gaping maw. These will likely be the heroes’ first targets so try to tuck them away safely and beware of the Chicken.
Since Ughurth comes in at a beefy 10 life, you can be a little more reckless with him trying to get the Devour shots to work. His biggest weakness is ranged shots. Usually heroes can hide behind obstacles and fire around at Ughurth, pecking away at him and denying him good attack lines to start with his Devour shot. Any hero that has a lot of range attacks will be your biggest priority.
Summary
Mercenary Monster: OrcJoining Ughurth are four Orcs, two Blood Skulls, and Roal
Life: 10
Ughurth has two shot sequences:
Devour > Critical Melee
Devour > Poison Melee
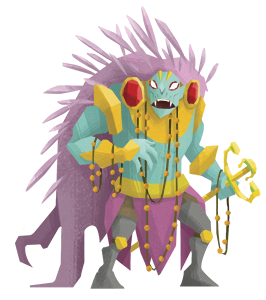
Soloth the Vampire Lord
Soloth. The biggest bad of the big bads. This last bonus Catacomb Lord comes on the flip side of the huge disc with Ughurth. Everything about the Catacomb Lord reeks with power. 12 life. 4 shot sequences of varying awesomeness. Effective and specialized minions. This should be a cakewalk against all but the most powerful hero groups.
Looking at the minions set, Soloth is supported by two nasty stun monster groups: the Skeleton Archers and the Ghouls. Both take multiple hits to defeat and can slow you down by stunning multiple heroes. The Vampire Guards are your basic beat sticks with some fun anti-positional Fear shots to help line up good stunning shots later.
Soloth’s shot sequences include a stun option to help shut down anyone that made it through his minion’s stun attacks. He also can regenerate a little bit but with his 12 life, he likely won’t need this very often unless playing very aggressive. To cap off his options, Soloth has two ranged options, one highly maneuverable and able to deal solid damage with a Giant Fireball or a brutal stationary attack with the Boulder shot.
Soloth doesn’t have many weaknesses but options that shut down Stun shots or take out his stun minions will be his biggest threat. After that, the heroes will need to have the a high amount of life at the start of the battle to last through the whole battle since chewing through 12 life will take some time. Like most Catacomb Lords, Antients can be an issue as their use typically favors the heroes in the final battle.
Summary
Mercenary Monster: Zombies
Joining Soloth are two Skeleton Archers, two Ghouls, and three Vampire Guards
Life: 12
Soloth has four shot sequences:
Rush > Regenerate Melee > Poison Missile
Rush > Melee > Stun Melee
Rush > Giant Fireball > Rush
Boulder shot
How useful was this article?
Click on a star to rate it!
Thank you for your feedback.
How can we improve this article?